PAMPI
Presentations With Markdown, Pandoc, Impress.
![]()
Presentation
PAMPI is a free software (license GNU GPL 3) allowing to make presentations easily.
- Presentations are written in text files
- And are therefore easily modifiable
- Markdown is fairly simple to learn
- Many examples of Markdown usage are available on the following page: https://enacit1.epfl.ch/markdown-pandoc
- They are converted into web pages (html files)
- They are displayed in your browser
- We can put them online, take them on a usb key, etc.
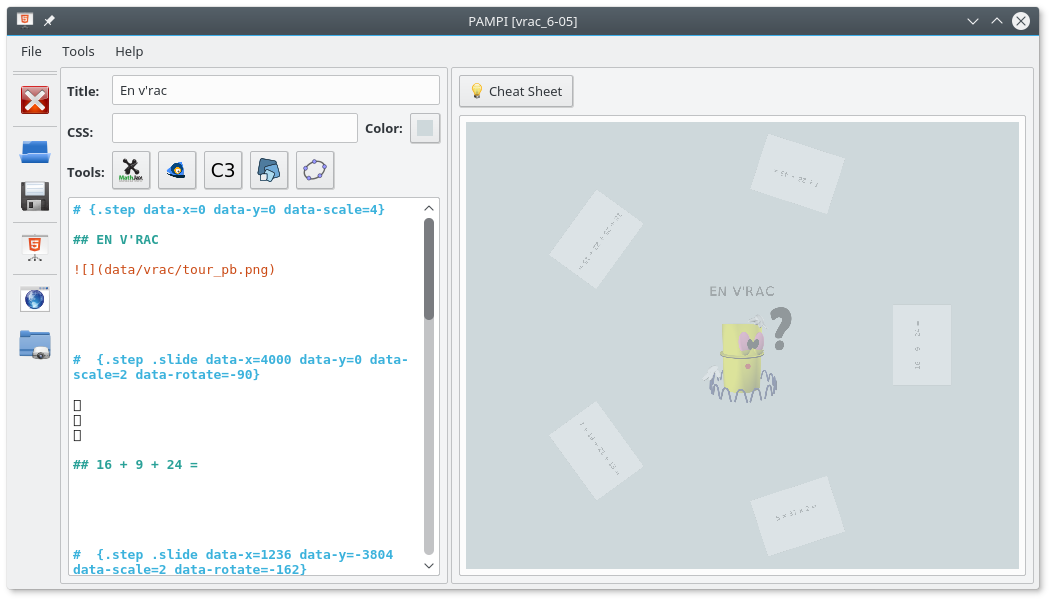
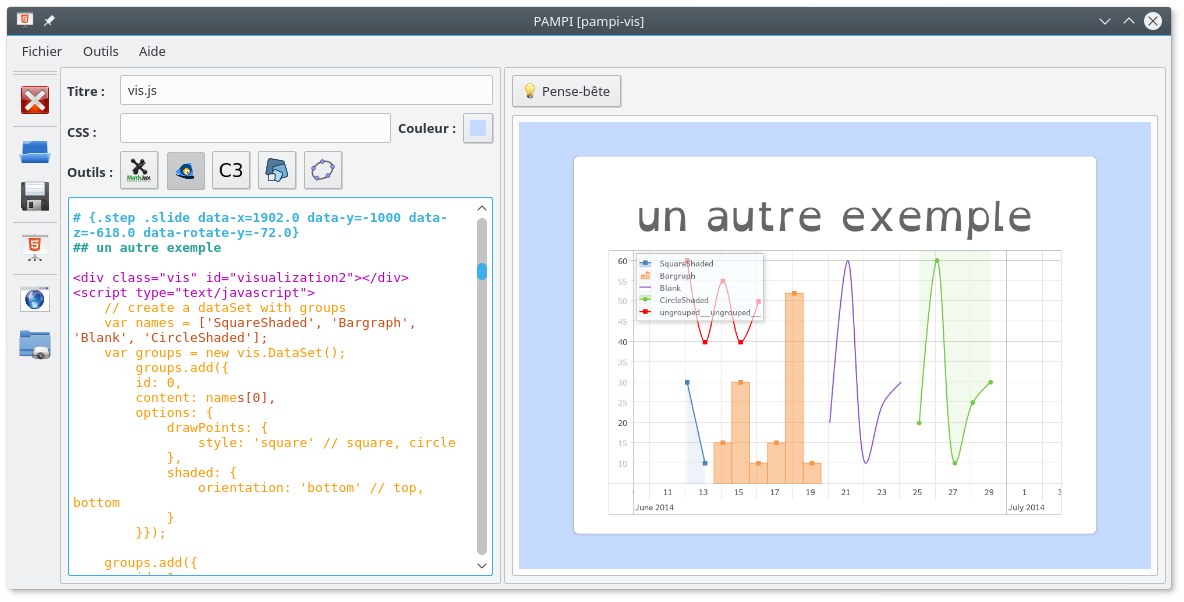
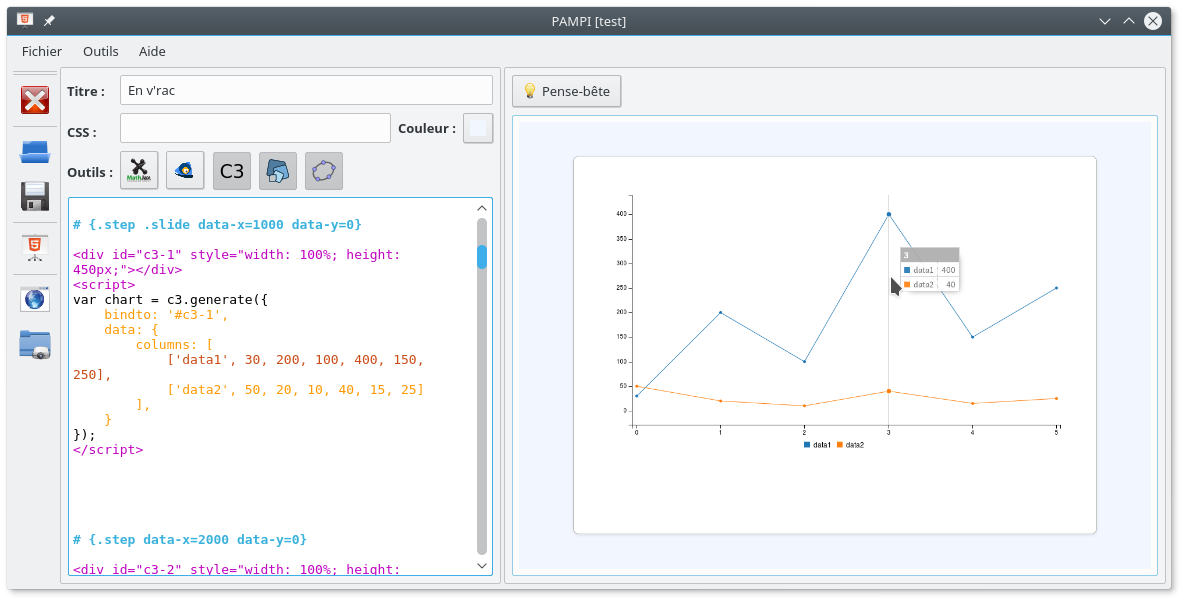
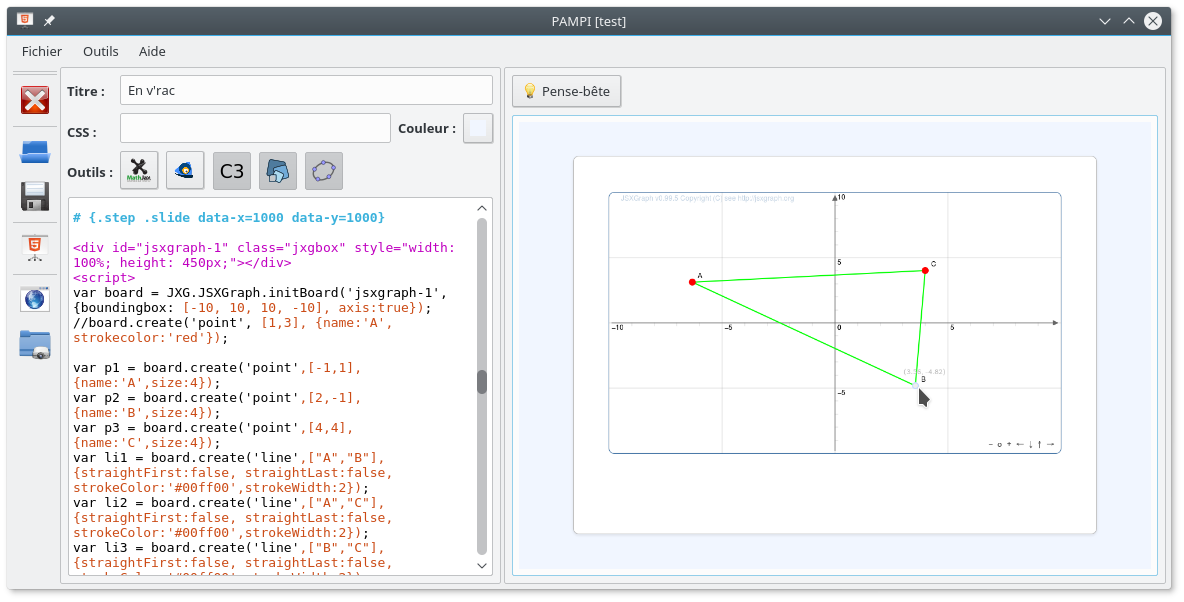
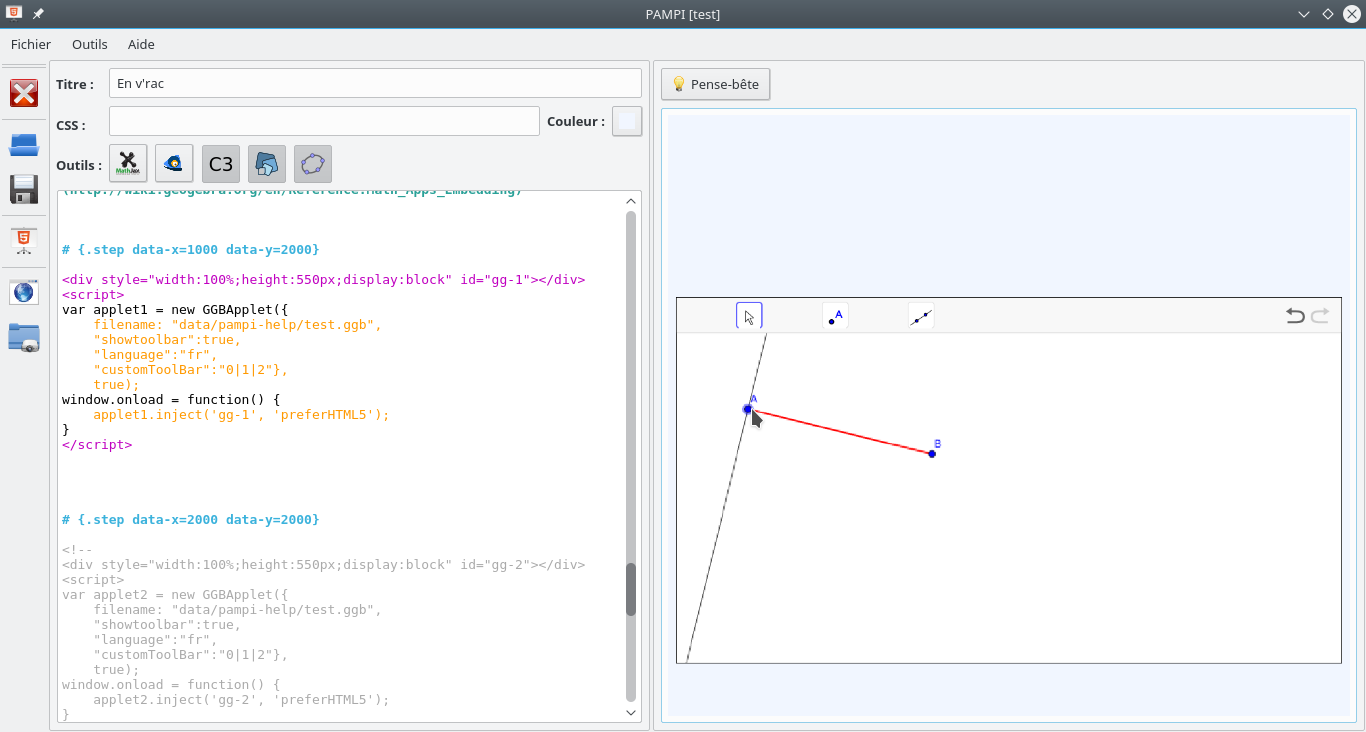
- In the PAMPI interface, the Markdown file is displayed on the left and you can see the result on the right (see the video above)
- Each step of a presentation is positioned where one wants in a space in 3D
- Its coordinates
- It can also be given a zoom factor
- And rotate
- Math can be written using KaTeX.
You will find examples here: https://en.wikibooks.org/wiki/LaTeX/Mathematics.
Examples of presentations made with PAMPI:
- PAMPI Help File
- According to demo of impress.js
- Examples of animation effects
- The presentation console
Dependencies:
- Python 3 is the programming language with which PAMPI is developed.
PAMPI is still compatible with Python version 2.7 (for older systems) - PyQt5 allows you to use Qt with Python, a library to create graphical interfaces, but also a lot of things.
PAMPI also remains compatible with PyQt4 (for older systems) - Pandoc a universal document converter.
Download and install
Choose a platform above.
- dependencies
- for Ubuntu 20.04, dependencies can be installed with the following command:
sudo apt install pandoc python3-pyqt5 python3-pyqt5.qtwebengine python3-pyqt5.qtsvg
- for Ubuntu 20.04, dependencies can be installed with the following command:
- PAMPI
- download and unpack the PAMPI archive: pampi.tar.gz
- to launch PAMPI, just click on the file pampi.pyw at the root of the folder
(or console:python3 pampi.pyw) - on the other hand, the menu File → Create Launcher will allow you to create a file PAMPI.desktop wherever you want (desktop, menu …).
- dependencies
- to install Python 3 and PyQt5, see page install PyQt on Windows
- PAMPI
- download and install pampi_setup.exe (PAMPI installation)
- to launch the program, you will find a shortcut in the Start menu and on the desktop
- note
- the executable of Pandoc is embedded with PAMPI.
- dependencies
- to install Python 3 and PyQt5, see page install PyQt on Mac
- to install Pandoc, use Homebrew with the following command:
brew install pandoc
- PAMPI
- download and unpack the PAMPI archive: pampi.tar.gz
- to launch PAMPI, it is enough
- click on the file pampi.pyw at the root of the folder pampi
- OR run in console with the command:
python3 pampi.pyw - OR move the pampi.pyw file to the terminal icon in the dock (at the bottom of the screen)
- notes
- if this does not work you have to manually modify the application that will open pampi.pyw.
To do this, select the file pampi.pyw then in the file menu, click get information.
In the open with section, select Terminal as the default application (or python launcher).
See this page: How can I change what program opens a certain file on a Mac?
- if this does not work you have to manually modify the application that will open pampi.pyw.
- SOURCES
- development at GitLab.
- In case of update of PAMPI
- manually copy the contents of the folder INSTALL/pampi/presentations/assets into the folder DOCUMENTS/presentations/assets
(where INSTALL is the folder where PAMPI is installed and DOCUMENTS/presentations the folder containing your presentations) - Explanations:
- Only at the first launch of PAMPI, the file INSTALL/pampi/presentations is copied into your file DOCUMENTS
- As you may need to modify some files (CSS, javascript, etc) to suit your needs, PAMPI should not overwrite your personal changes
- If you have changed some files in the assets subfolder, check on the GitLab repository what has been changed in PAMPI so that you do not lose your changes.
- manually copy the contents of the folder INSTALL/pampi/presentations/assets into the folder DOCUMENTS/presentations/assets
Feature details
Menus
- File
- File → New
- File → Open (this action is also available in the toolbar)
Some file templates are provided (list below) as well as the sources of the 4 sample files - File → Recent Files
- File → Wizard
Allows you to select a presentation form; to see further - File → Save (this action is also available in the toolbar)
- File → Save as…
- File → Export the presentation
After selecting a folder to export your presentation, PAMPI will create a subfolder containing everything necessary to make it work.
The file will automatically be opened at the end of the procedure.
You can copy it to a key, compress it and send it as attachments, etc.

- File → Create a launcher (available only under GNU / Linux)
- File → Exit (this action is also available in the toolbar)
- Tools
- Tools → Save, convert and preview (this action is also available in the toolbar)
This is the essential action to see what your changes are doing - Tools → Open in the browser (this action is also available in the toolbar)
Displays your presentation in your web browser - Tools → Use KaTeX (this action is also available in the toolbar)
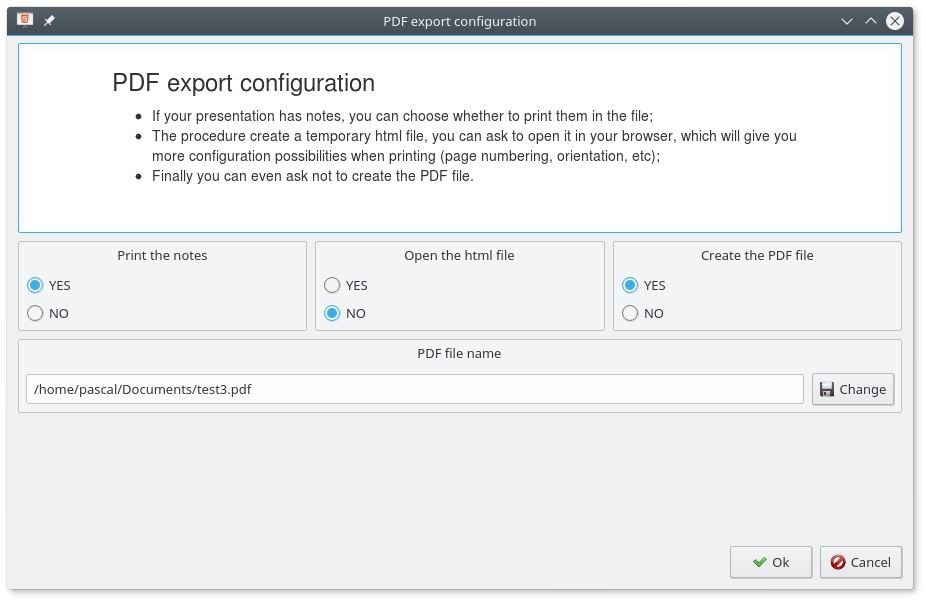
Consider checking this action if you intend to use mathematical expressions in your file - Tools → Create PDF file
Creates a file containing a page for each step in the presentation
- Tools → Save, convert and preview (this action is also available in the toolbar)
- Tools → Open the presentation folder (this action is also available in the toolbar)
See below for a description of the contents of the file - Tools → Change the presentation folder
Allows you to change its location (all files will be moved to the new folder)
- Help
- Help → Help
- Help → About
- Help → Cheat Sheet (this action is also available as a button)
Displays the Cheat Sheet instead of the preview.
The Cheat Sheet contains a list of order templates ready to be copied and pasted into your files.
You can even make it editable in order to add your own commands.
The presentations folder

- It contains the html versions of your presentations and the following subfolders
- assets: The tools needed to run presentations (css files, javascript, fonts, etc)
- data: The data of your presentations (images, etc).
Create a subfolder for each presentation to make it easier to find it (using the same name for the subfolder and for the presentation file) - md: The source files (Markdown) of your presentations.
- By default it is created in the documents folder of your computer (its location depends on the system), but you can change this location
(menu Tools → Change the presentation folder).
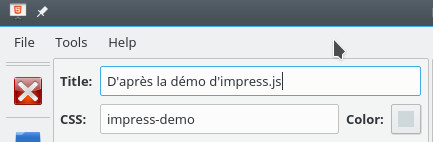
Title, CSS file, background color
- For each presentation you can specify a title (it will be displayed in the title bar or the tab of your browser)
- If you know what a file CSS is , you can also use a custom CSS file to modify the style of your presentations or add effects
- The background color of your presentation can be changed by clicking on the dedicated button
- Your CSS files must be placed in the assets/css subfolder (inspired from the default.css file)

Wizard
- The wizard allows you to select a presentation form from a list and then set various parameters
- The steps of your presentation are automatically positioned and you only have to modify their contents
- You can ask to copy the result to the clipboard instead of replacing your current file
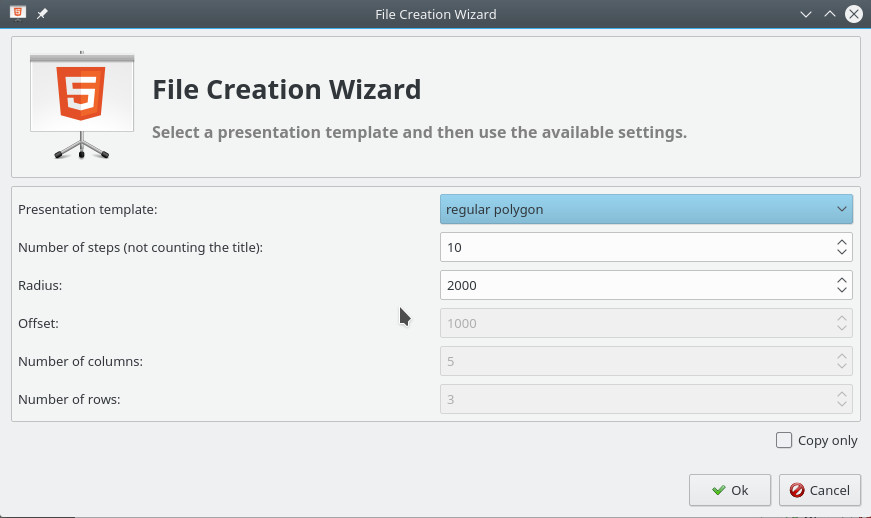
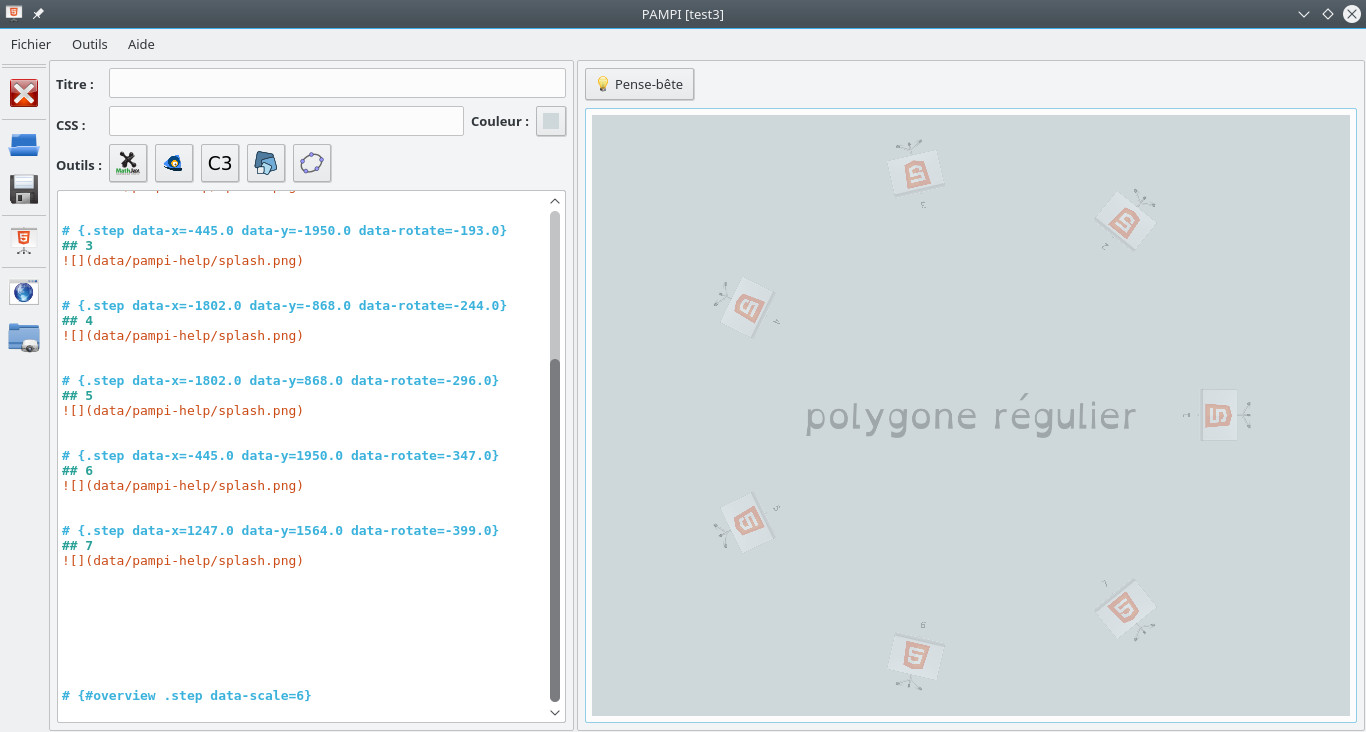
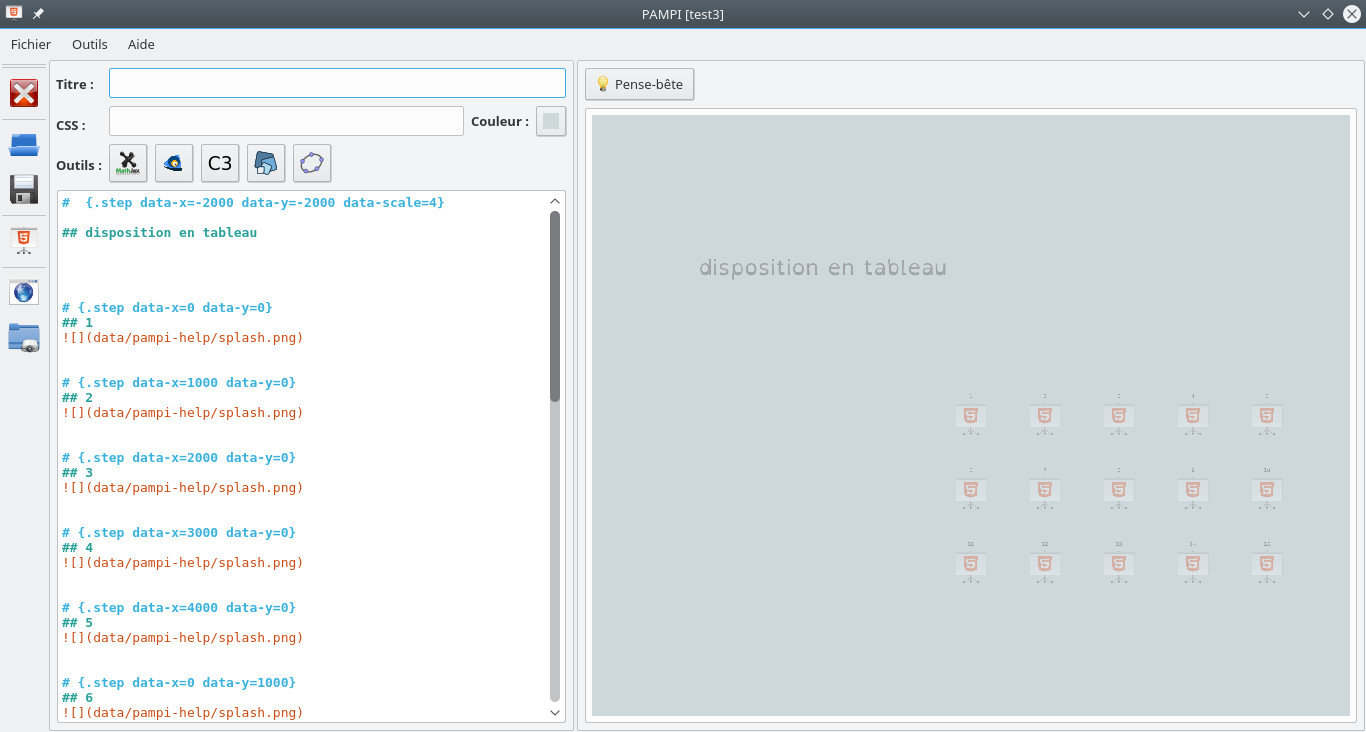
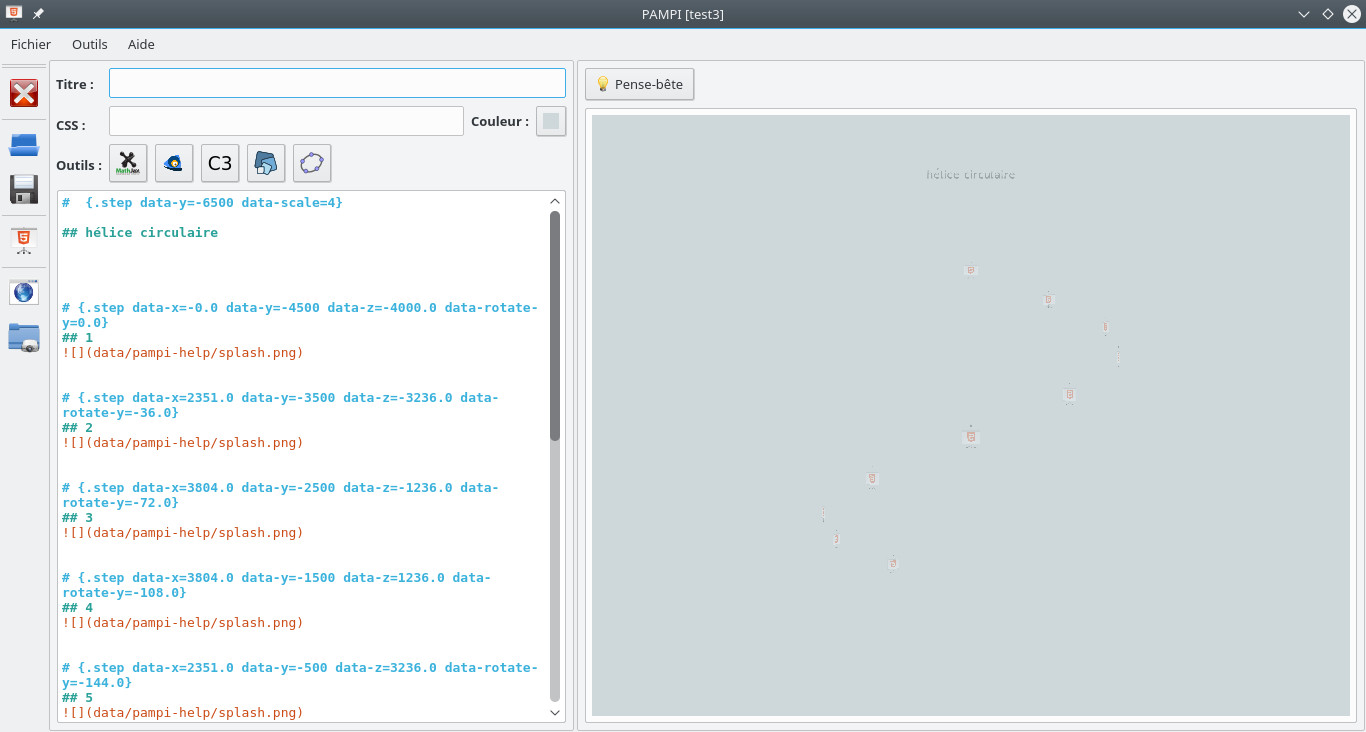
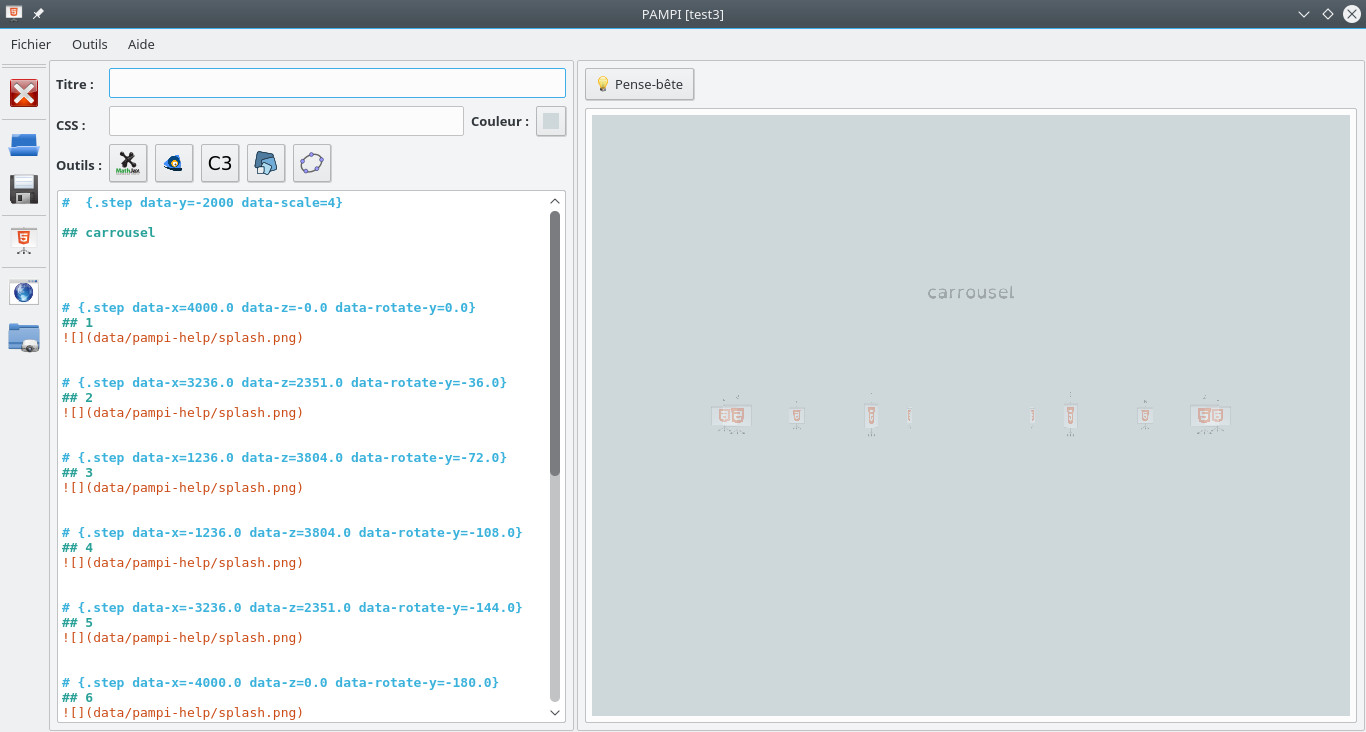
- List of presentation forms available (click on an image to enlarge)
regular polygon
arrangement in table
circular helix
carousel
List of file templates
The models allow you to start from a ready-made layout.
After opening the template that matches what you want, just save it with a new name and then overwrite the content of the steps.
- model-3d: a model in 3d
- model-5: a model for 5 questions
- model-circle: a circular arrangement
- model-helice: a circular helix
- model-pentagon: a regular pentagon
- model-spiral: a spiral
- model-table: a table layout
Other tools available


Tools used
- to develop PAMPI
- and those used for presentations
History and motivation
- I started using Markdown + impress.js to make presentations towards the end of 2015.
I use it for some presentations made in front of colleagues of work (teachers) but especially in classroom for demonstrations, reminders, flash questions, etc. - I tested a little Hovercraft! but I finally preferred Pandoc in command line (see for example this page for operation)
- From Hovercraft! I kept 2 3 tricks (help window, impress-console even if I do not really use it, …)
- I made some changes in impress.js to manage the mouse
(I prefer to stand with a wireless mouse in my hand and be able to move around the room instead of sitting behind a keyboard) - Several colleagues have asked me how to make such presentations.
But the tools I use are not really within their reach (command line, and in addition most are under Windows) - So I wanted to provide them with an interface that allows this in a sufficiently simple way
- This is how PAMPI was born at the beginning of 2017.
FAQ
How to link non successive steps?
It is possible by giving names to the steps (or by retrieving the name automatically assigned from its browser, but it is less practical).
Example:- Give a name to the target step:
# {#machin .step ...} - In another step we put a link:
[go to see machin] (#machin)
- Give a name to the target step:
How does the overview view work?
A double click passes to “overview” and from there you can go to a step by clicking on itHow to change the background color used by default?
It is defined in the DOCUMENTS/presentations/assets/css/default.css file, in the body
    body {
                    ...
                    background: #ced8db;
}- How to put a background image?
It also happens in the file DOCUMENTS/presentations/assets/css/default.css file, in the body
    body {
                    ...
                    background: white url('../../data/pampi-help/splash.png') no-repeat center center;
}- How to insert a video?
Using a bit of html code; There is an example to the end of the pampi-help file
    <div class="figure">
                <video controls class="embed-responsive-item">
                <source src="data/pampi-help/tour.mp4" type="video/mp4">
                </video>
                </div>
Last modification of this page: 2022-10-24.